
For procurement specialists and project managers driving new smart home product development (such as smart speakers or gateways), balancing speed, cost, and quality in the prototyping phase is critical. This analysis provides a data-driven comparison of three mainstream processes—3D printing, CNC machining, and vacuum casting—to outline the most efficient and economical strategy across concept validation, functional testing, and low-volume pilot production.
Project Scenario: You need 50 sets of high-fidelity engineering prototypes, including enclosures and internal components, for market testing.
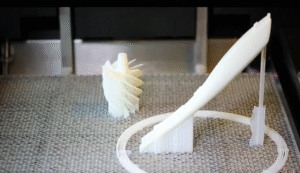
Phase 1: Concept Validation & Rapid Design Iteration
Recommended Process: Industrial-grade SLA/DLP 3D Printing
Cost & Timeline Analysis: This is the fastest option with the lowest initial investment. The cost per prototype can be 30%-50% lower than CNC machining. Upon receiving CAD files, the first iteration can be delivered within 24-48 hours. This speed enables rapid evaluation of form, fit, and basic function. While material properties may not match final specifications, the unparalleled iteration velocity helps lock down the design early, preventing costly changes in later stages. Partnering with a rapid prototyping service that offers fast-turnaround 3D printing is crucial for this agile phase.
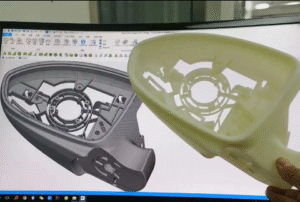
Phase 2: Engineering Verification & Functional Testing
Recommended Process: CNC Machining
Cost & Timeline Analysis: For rigorous testing (drop tests, thermal dissipation) or achieving end-product-like aesthetics, CNC prototyping is indispensable. It utilizes real engineering materials like ABS, PC, or aluminum alloys, ensuring reliable and valid test results. Although the per-part cost is higher than 3D printing, the typical 5-7 day lead time remains significantly faster than injection molding. This investment is vital for de-risking the project before committing to volume production.
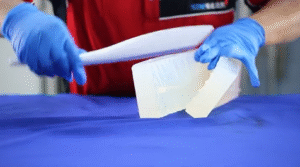
Phase 3: Low-Volume Pilot Production (50-100 Units)
Recommended Process: Vacuum Casting (Urethane Casting)
Cost & Timeline Analysis: For a batch of 50 units, vacuum casting is the most optimized solution. The process starts with creating a high-precision CNC master pattern (a one-time cost). A silicone mold is then built around it, enabling part replication. While the initial mold requires 7-10 days, subsequent parts can be cast every 1-2 days at a dramatically reduced unit cost—typically 20%-40% of the cost of a CNC-machined part. The available polyurethane resins can mimic ABS, PP, or offer specialized properties like flame retardancy, making them ideal for market sampling, crowdfunding deliveries, or vacuum casting for medical devices that require biocompatibility testing.
Integrated Value Conclusion: The Hybrid Approach
Evaluating based solely on unit price is misleading. A hybrid strategy consistently delivers the best overall value:
Use 3D printing for swift design iterations.
Employ CNC machining to validate critical function and durability.
Leverage vacuum casting for cost-efficient, high-quality low-volume runs.
This strategic combination can compress the development cycle for a smart hardware product to 6-8 weeks while keeping total costs controlled. When seeking a low volume manufacturing China partner, prioritize suppliers who offer this flexible, integrated one-stop solution. Their ability to seamlessly combine these processes is often the defining factor between a project’s success and budget overruns.
Leave a Reply